申请测试号进行调试开发,测试号拥有大部分服务号有的接口权限。
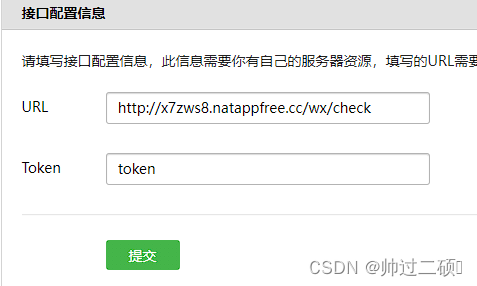
一、接口配置信息填写校验
这里需要填写一个URL和一个Token验证字符串
我这里是用了natapp内网穿透 将本地的后台8080端口服务映射到了 http://x7zws8.natappfree.cc
https://natapp.cn/在natapp官网注册账号并且申请免费隧道
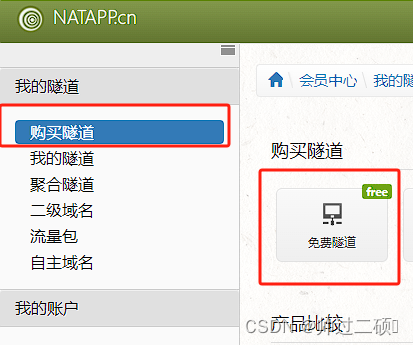
申请完了之后把域名绑定到自己的后台
后台接口:
@RequestMapping(value = "/check", produces = "text/plain;charset=UTF-8", method = {RequestMethod.GET, RequestMethod.POST})//微信服务器根据配置的token,结合时间戳timestamp和随机数nonce通过SHA1生成签名,发起get请求,检验token的正确性,//检验正确原样返回随机字符串echostr,失败返回空字符串public String check(HttpServletRequest request, HttpServletResponse response,@RequestParam("signature") String signature,@RequestParam("timestamp") String timestamp,@RequestParam("nonce") String nonce,String echostr) throws Exception {//若是为get请求,则为开发者模式验证if ("get".equals(request.getMethod().toLowerCase())) {String checkSignature = SHA1.creatSHA1("token", timestamp, nonce);if (checkSignature.equals(signature)) {return echostr;}}return null;}
SHA1:
import java.security.MessageDigest;
import java.util.Arrays;//SHA1加密算法类
public class SHA1 {/**** @param token* @param timestamp 时间戳* @param nonce 随机字符串* @return 安全签名* @throws AesException*/public static String creatSHA1(String token, String timestamp, String nonce) throws AesException{try {String[] array = new String[] { token, timestamp, nonce};StringBuffer sb = new StringBuffer();// 字符串排序Arrays.sort(array);for (int i = 0; i < 3; i++) {sb.append(array[i]);}String str = sb.toString();// SHA1签名生成MessageDigest md = MessageDigest.getInstance("SHA-1");md.update(str.getBytes());byte[] digest = md.digest();StringBuffer hexstr = new StringBuffer();String shaHex = "";for (int i = 0; i < digest.length; i++) {shaHex = Integer.toHexString(digest[i] & 0xFF);if (shaHex.length() < 2) {hexstr.append(0);}hexstr.append(shaHex);}return hexstr.toString();} catch (Exception e) {e.printStackTrace();throw new AesException(AesException.ComputeSignatureError);}}
}
AesException:
public class AesException extends Exception {public final static int OK = 0;public final static int ValidateSignatureError = -40001;public final static int ParseXmlError = -40002;public final static int ComputeSignatureError = -40003;public final static int IllegalAesKey = -40004;public final static int ValidateAppidError = -40005;public final static int EncryptAESError = -40006;public final static int DecryptAESError = -40007;public final static int IllegalBuffer = -40008;private int code;private static String getMessage(int code) {switch (code) {case ValidateSignatureError:return "签名验证错误";case ParseXmlError:return "xml解析失败";case ComputeSignatureError:return "sha加密生成签名失败";case IllegalAesKey:return "SymmetricKey非法";case ValidateAppidError:return "appid校验失败";case EncryptAESError:return "aes加密失败";case DecryptAESError:return "aes解密失败";case IllegalBuffer:return "解密后得到的buffer非法";default:return null; // cannot be}}public int getCode() {return code;}public AesException(int code) {super(getMessage(code));this.code = code;}
}
校验走完之后配置测试号中 网页服务下的网页授权获取基本用户

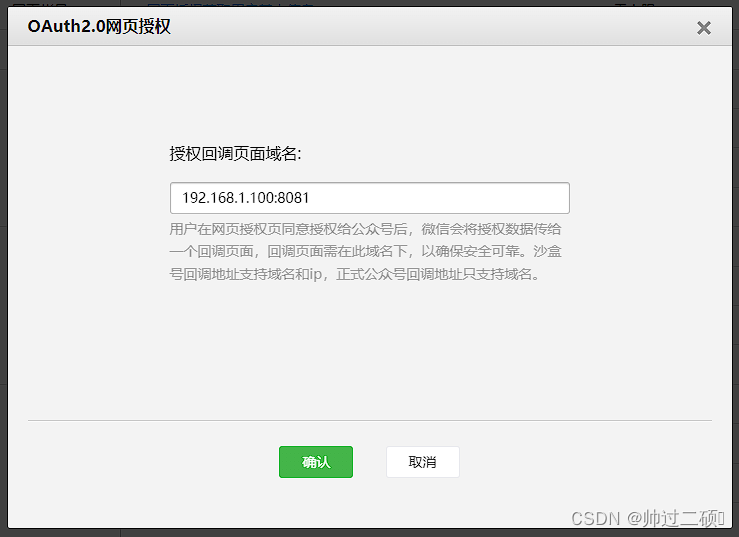
这里填自己前端项目运行后的地址 我的后端项目端口是8080 uniapp前端运行完了之后的端口是8081所以我配置的是本地的ipv4 ip+端口号
二、后端配置 + 拼装URL + 通过Code获取用户OpenID和基本信息
在SpringBoot项目的pom中引入依赖
<dependency><groupId>com.github.binarywang</groupId><artifactId>weixin-java-mp</artifactId><version>4.6.0</version></dependency>
创建配置类
import com.ruoyi.system.domain.WechatConfig;
import com.ruoyi.system.service.IWechatConfigService;
import me.chanjar.weixin.mp.api.WxMpService;
import me.chanjar.weixin.mp.api.impl.WxMpServiceImpl;
import me.chanjar.weixin.mp.config.WxMpConfigStorage;
import me.chanjar.weixin.mp.config.impl.WxMpDefaultConfigImpl;
import org.springframework.beans.factory.annotation.Autowired;
import org.springframework.context.annotation.Bean;
import org.springframework.context.annotation.Configuration;@Configuration
public class WxMpConfig {@Autowiredprivate IWechatConfigService wechatConfigService;@Beanpublic WxMpConfigStorage wxMpConfigStorage() {WxMpDefaultConfigImpl configStorage = new WxMpDefaultConfigImpl();WechatConfig wechatConfig = wechatConfigService.selectWechatConfigById(1L);//我这里是做成了获取数据库中保存的AppID和AppSercret正常情况下写死就可以configStorage.setAppId(wechatConfig.getAppId());configStorage.setSecret(wechatConfig.getAppSecret());return configStorage;}@Beanpublic WxMpService wxMpService(WxMpConfigStorage configStorage) {WxMpService wxMpService = new WxMpServiceImpl();wxMpService.setWxMpConfigStorage(configStorage);return wxMpService;}
}
之后就可以在Controller中正常使用了
/authorize 接口其实只做了一步操作 就是构建获取code的url 构建完成之后返回给前端 前端直接重定向
buildAuthorizationUrl其中的三个参数
第一个是回调地址
第二个填snsapi_base 或者 snsapi_userinfo
snsapi_base 是之能获取到 openid 而 snsapi_userinfo 是可以获取到用户基本信息
snsapi_base是静默获取 而 snsapi_userinfo 需要用户点击授权
@RestController
@RequestMapping("/wx")
public class WeChatController extends BaseController {@GetMapping("/authorize")public AjaxResult test() {WxOAuth2Service oAuth2Service = wxMpService.getOAuth2Service();String redirectUrl = oAuth2Service.buildAuthorizationUrl("http://192.168.1.100:8081", "snsapi_userinfo", null);return success(redirectUrl);}@GetMapping("/userInfo")public AjaxResult userInfo(@RequestParam("code") String code) throws WxErrorException {WxOAuth2Service oAuth2Service = wxMpService.getOAuth2Service();WxOAuth2AccessToken wxMpOAuth2AccessToken = oAuth2Service.getAccessToken(code);logger.info("【wxMpOAuth2AccessToken:】{}", wxMpOAuth2AccessToken);String openId = wxMpOAuth2AccessToken.getOpenId();logger.info("【openid:】{}", openId);WxOAuth2UserInfo userInfo = oAuth2Service.getUserInfo(wxMpOAuth2AccessToken, "zh_CN");logger.info("【用户信息:】{}", userInfo.toString());return success(userInfo);}
}
二、uniapp前端调用
前端首先调用 /authorize 获取拼装好的地址然后重定向并获取code
getUrlCode来判断地址中是否包含code如果有的话拿着code去获取用户基本信息和openid
<template><view class="content"><image class="logo" :src="loginUser.headImgUrl ? loginUser.headImgUrl : '/static/logo.png'"></image><view class="text-area"><text class="title">{{loginUser.openid}}</text></view><button type="default" @click="login">登录</button></view>
</template><script>export default {data() {return {loginUser:{}}},onLoad(query) {const that = this;let code = that.getUrlCode();if (code) {console.log("有code")console.log(code)uni.request({url: "http://192.168.1.100:8080/wx/userInfo",data: {code: code},success(res) {console.log("获取到用户信息")console.log(res.data.data);that.loginUser = res.data.data;}})} else {console.log("没有code")}},methods: {login() {uni.request({url: "http://192.168.1.100:8080/wx/authorize",success(res) {window.location.href = res.data.msg;}})},getUrlCode() {return (decodeURIComponent((new RegExp("[?|&]" + "code" + "=" + "([^&;]+?)(&|#|;|$)").exec(location.href) || [, ""])[1].replace(/\+/g, "%20")) || null);},}}
</script>